My original ideas came from a pinterest pin http://bktribe.blogspot.com.au/2011/11/disney-cars-birthday-party.html and the link to the tutorial.
So, here we go!

.jpg)
So first I drew the shape of Doc Hudson then added "tabs" and cut out the side, keeping the long edges attached completely at this stage.

The next stage was to fold the "tabs" over and shape and stick the long sides down. Some of the boxes were quite thick so needed to be glued as well. I also made sure all rough edges were covered with masking tape so that the kids (mostly 3 year olds) won't cut themselves. Cardboard cuts don't make for a fun party :-).

The next stage was to paint the whole thing white. On a previous one I didn't do this and the result was less than satisfactory. I used a white gesso paint which is also a primer (the coloured paints don't get sucked into the cardboard, so you end up using less).

Add a few details in pencil, then do the main colour painting.
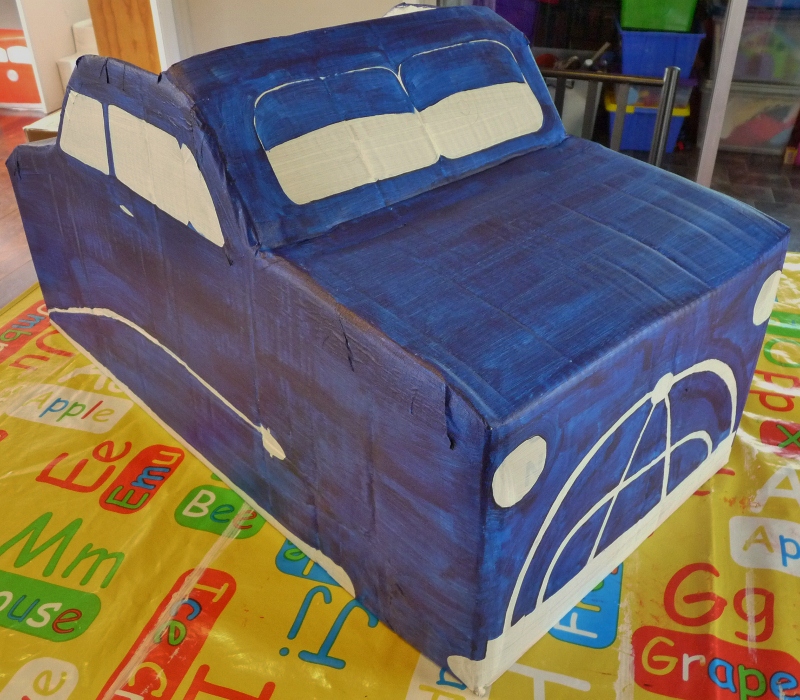
And finally, add all the details! I'm SO stoked with the results!

I'm trying to decide whether to add straps to hold the cars up, or let the kids hold them up by themselves. Oh! And we'll be adding black plastic plate wheels at the party - the kids will collect them from Luigi's Casa Della Tyre :-)
So there you go! I have 2 complete, 3 getting their details and 5 to do from scratch. And 2 weeks till the party! Wish me luck!!! (I think I'm crazy!)
They are awesome Michelle Your a very clever mumma :)
ReplyDeleteThanks Shiralee! Like I said, the idea came from somewhere else, but I'm really happy with the results. Hope you guys are going well up there!
Delete